WELCOME!

Welcome! Thank you for stopping by our page! I'm a 36 year old educated stay at home mother of a energetic 3 year old boy who keeps me on my toes! I like to research all sorts of craft ideas, recipes, activities for my son, home remedies, DIY, all the best freebies, deals, coupons, and more! God Bless The USA!

Coupons.com

Friday, February 6, 2015

Jackpot Candle Giveaway

When it comes to candles, I like clean burning soy candles best. Evenmore so, I really like candles that come with an awesome incentive: Jewelry! Thats why I'm writing this review for a Jackpot Candle. With Jackpot Candles, not only do you get a great smelling candle, but you get to choose what kind of jewelry you want inside. You can choose from a necklace, a pair of earrings, or a ring in whatever size you want. Another cool thing is that the jewelry you get can be valued anywhere from $15 to $5,000! I decided on a necklace since it's the one piece of jewelry I don't currently have. Jackpot Candles use 100% soy wax in their candles and tarts. Soy wax is a clean burning wax and puts off less toxins into the air. It's also natural, and comes from soybeans! Jackpot Candles has a great line of scents! I chose Blueberry Muffin...and boy does it smell good! The scent is a great match to fresh blueberries baking in a fluffy warm muffin. Even when not lit, I can smell the sweetness of the candle. Here are the other scents they have: Valentine Candy Hearts, Banana Nut Bread, Birthday Cake, Caramel Coffee Latte, Cherry Blast, Christmas, Cinnamon Sensation, Cucumber Melon, Hot Fudge Brownie, Jack Frost, Lilac, Ocean Breeze, Pina Colada, Sweet Pea, Vanilla Cupcake, and Watermelon. Jackpot Candles also carries wax tarts in the same scents with one extra scent: Santa's Cookies.
I lit my candle around 4:45 PM on the day I got it. (A Thursday.) Waiting is the hardest part! I want the style of my necklace to remain a surprise. The element of surprise is the best when being patient! Around 10 PM, I used a toothpick to "feel" if my jewelry was accessible through the melted wax, and it was! (I only did this because the wax in my candle was too dark to see through.) I used a pair of needle nose jewelry pliers to pull out the foil packet that my necklace was in. I had to have paper towels on hand, because it does get messy! I tore open the foil packet and revealed a small plastic zipper bag that had my beautiful necklace in it.
I then open my little bag and pulled out my gold necklace with a very pretty amber colored heart shaped pendant.Attatched to the necklace was a small tag with a special code on it. I had to go enter my appraisal code on the Jackpot Candle's website under their menu tab. I was presented with a message telling me that my necklace is worth $48.00. Not bad at all! I know one thing, I will be purchasing a candle from Jackpot Candles in the near future, as they have become a new favorite candle of mine.
Please know that this giveaway is in no way sponsored or affiliated with Facebook, Twitter, or Instagram. Under FTC guidlines, I received a product in exchange for my review of the product. I did not receive any payment or other monetary incentive. All views of this review are solely of my own writing. Now for the fun part: A giveaway! Jackpot Candles has paired with Crafty, Couponing Momma's to giveaway one candle to one of our fans! All you have to do is enter through the form below. The giveaway will run for one week, so send your friends and family to like our facebook page and enter the giveaway! Most of all, have fun!
a Rafflecopter giveaway

Friday, January 11, 2013

My First Craft Show!


MY FIRST CRAFT SHOW!


This past year has been a tough one on all of us, my family included.  Knowing that I would simply stress out if I did'nt find an outlet, I turned to making hand crafts. In doing so, I quickly realized how satisfying working and creating with your hands really is. Before I knew it,  I’d created enough stuff to sell at a craft show.

My mom and her friend Irene have been doing craft shows together for over 15 years.  In the past I’ve often helped them with the larger shows; even making a few things here and there to sell.


I want to share with you my adventurous story about going from simply contributing to a craft show, to running my own booth. The timeline starts at 8 o’clock Friday morning and will end on 6 o’clock Sunday morning. I hope you enjoy reading this as much as I enjoyed experiencing it!


All year I’ve been steady contributing more and more to mom’s craft booth, gradually needing my own space. Since we got settled in after being over the road truckers for 6 years, I’ve been trying to do more to help mom wherever and whenever I can. A lot of my help has been with the set up and breaking down of  her craft booth. So knowing from past experience, craft shows are a lot of work and can tire out even the most energetic crafter. There’s quite a few things involved with doing one. First is planning, the next is presentation, the last is preparation., the three “P’s”.

A month before the craft show, I started working on all seasonal related items, (this time being Christmas/Winter).  I worked on my crafts whenever the opportunity arose,  gradually getting some things marked off my list, with the final item being crossed off at 4:30 a.m. Saturday morning.  Not only did I make over $700 worth of products,  I made gluten free cookies and peppermint fudge,  printed out all types of signs and tags, and packed up everything I knew I would need (with the exception of the kitchen sink).


On the day before the show, the heat was on so to speak. Knowing that I probably would not get any sleep, I took as many breaks as possible to keep rested and spend time with my family. Originally, we were all going to go so I could have a little help with set up and get a chance to wander around and look at all of the other wonderful hand crafts. But as they say,  “Man makes plans, God laughs”. Anyway,  when I wasn’t taking breaks, I was busy completing everything that was left on my list.

Finally at 4:30 Saturday morning, I marked the final item off the list. I went and stretched out for a quick 30 minute rest (setting the alarm just in case).  I arose, splashed water on my face and got ready for the day. Shortly afterward, my little man decided to wake up and I had to put him back to sleep. As I was finalizing the last details and packing, the little guy woke up again. Fortunately my step-son and his family were spending the night and my daughter in law graciously offered to watch him for the day so I didn’t have to worry about him being under foot at the show and that someone would take care of him for me.


I was getting about a later start than I wanted but figured it would all work out eventually. I hit the drive through for breakfast and stopped to visit my hubby at his workplace. Not a whole lot to note about the hour plus drive except for the beautiful sunrise, drinking coffee from the wrong side of the cup and pouring some of it on my clean shirt and the idiot driver that thought he could pass more than one vehicle in a short passing zone with a blind hill. Good thing I keep a safe distance between vehicles when I drive, or the poor guy would have actually hit the oncoming car.

Anyway, I made it to the craft show about 15 minutes later than expected. Hoping that mom would be there early to help me set up, I went inside in search of someone that could help me. Mom and her friend were still enjoying their morning off since they had the luxury of showing up the night before to set up. I found the office, explained who I was and what I was needing. There was some discussion what to do about the tent and having enough room, and unfortunately for me, I started to set up in the incorrect area. The person in charge of the show explained that the space meant for my tent was on the sidewalk up against the building; not on the grass. The grass was apparently something special since the center had spent money to have it put in and there was a fence surrounding it at one time. I have to admit that during this part of the conversation I did glance down at the grass and wondered to myself what was so special about crab grass!


After I was assisted in my move to the spot I was suppose to use, I was almost an hour behind! The set up was going to be completely different than I’d planned and I felt as though I didn’t have a clue about what to do! Thankfully mom finally showed up! She told me that one of the other craft vendors had come and told her what had happened to me and she quickly came to my rescue.

I missed most of the first part of the opening but eventually everything settled down and I was able to enjoy myself. It’s nice to have others say such positive and nice things about things you create. It’s quite an honor for them to purchase them as well. I handed out over 20 business cards and I hope that maybe I’ve gotten some new followers and possibly some new orders!


Being in such close proximity to the loading area, I was unable to pack my items until and hour after it was over. However, I did make about $20 more by waiting until the area had cleared out. I ended the day with making $138 and most likely could have made even more if I had someway to plug in my lighted, hand made grape vine & cedar wreaths and baskets.

I only had the chance to do a couple of quick rounds to see what everyone else had made and brought and I took several pictures for reference. One older gentleman made tractors our of old sewing machines (see picture below), while another lady that was close to mom’s booth made snow man hat bird houses out of metal cans (see picture below), tin can snowmen (see picture below) and humming bird feeders with a glass bottle (see picture below).


At 5pm, I was finally all packed up and ready to go. About 30 minutes into my trip, I had to call mom so she could help me stay awake. I normally have to do this for her since it’s rare that I can go to one that’s over an hour away. I couldn’t even begin to tell you what we talked about but I do remember referencing to one of the towns I’d just passed through as another town that was nowhere near my route. After much laughs and benign conversation, I made it back to my hubby’s work where I practically poured out of my ride.

After a quick visit and a little walking around to wake up, I switched vehicles and left out to pick up take out and make it to the house before the little guy thought I’d never come home. I spent some of my profits on the take out and child care, but it was totally worth it since I didn’t have to worry about my son and we ate on that chicken dinner 4 times before it was all gone! Luckily when I got home everyone was asleep with the exception on my daughter in law. I took a long a luxurious shower and dined on take out chicken. I finally passed out minutes after the kids went home, which was around 9pm. after being up over 36 hours, I just couldn’t stay awake any longer!

I woke Sunday at 6 am feeling like someone had run me over. The thought of getting out of bed and putting clothes on physically hurt me. I toughed it out and got my lazy, sore behind out of bed.  I don’t recall much about Sunday other than feeling like I was running around in a mind fog, like I had taken too much cold medicine. It took all week, but I finally feel like my old self again!

SOME TIPS FOR HAVING YOUR OWN BOOTH AT A CRAFT SHOW:

*Be sure when paying for a booth area, you know exactly where you are suppose to be located.
*Make eye catching signs for all of your products, even if they’re individually priced. The customer’s seem to notice them better. Signs should be short and informative, for example: Handmade Snowmen $1 in XL font seemed to really help those guys make new homes.
*Let your needs be known before hand, if electricity is needed, be sure to make arrangements to have this service available at your booth.
*Be sure to make a list of all the craft projects you’d like to make, and a packing list with items that you’ll need at the show such as pens, markers, tags, glue, scissors, tape, hanging S hooks, etc… and anything else that you may possibly need. In this case I forgot my chair and was given one to use. If I’d remembered to put it on the packing list, I wouldn’t have forgotten!
*Take things to work on, people enjoy watching you do your craft.
*Be polite and answer all questions and comments politely.
*For outdoor shows, a tent and tarps are a must!
*Cover tables with cloths or sheets. Use a clothes pin to secure the cloth under the table on the back of the leg. You can also use a large safety pin to keep the fold secure.
*Hide storage containers under tables.
*Make a grid (drawing) of where you are going to place the tables, hanging items, a work/pay area and the rest of your items.
*Decorate with items that attract the eye and are available for purchase. However, mark these items discretely (on the bottom) as some of the decorations may be re-sale items.
*Pack snacks and drinks. Also bring along something to keep you busy other than your art/craft items, such as a book or magazine.
*Wear comfortable clothing and shoes. Layer shirts if possible, having a clean one for the actual show and the other for the set up and break down.
*Make enough product to ensure a profitable sale. You can expect about 20%-30% off your total product to sell. In this case I made $700 worth of product and sold $138 worth.
*Budget in costs for gas, the booth price and lunch. I had roughly $40 in expenses making my take home profit of $98.


That’s all I can think of at the moment. I’m sure there’s a lot more great tips that I can’t seem to think of and if you think of one, don’t hesitate to leave a comment below! I hope you all enjoyed this little adventure of ours and I look forward to many more!

Additional pictures from the craft show:


Thank you all for being such great fans! Happy crafting!

Michelle Gosser
Crafty Couponing Mommas & M-n-M Crafts

Thursday, January 10, 2013

My Perfect Cup of Joe


How I Make a Perfect Cup of Java

Let’s start with the coffee itself.  You may have a specific preference on brands and types of brews or you may like to experiment with them, like myself.  The first rule I use is of course, use a coupon! I love Seattle’s Best, but is not available at my local store. I’m currently trying Community Coffee and have been happy with my purchase not to mention the savings! I buy whole bean only. Period.

Finding a specialty flavor in whole bean coffee can be difficult. To save space, my store only offers Columbian or French Roast and if I’m lucky a specialty blend.  Try to avoid coffee bean bins if at all possible, since you have no idea how long those beans have been sitting there losing their flavor. After you’ve purchased your coffee, open the bag and put the beans in an air-tight container out of the fridge and out of the sunlight.

 If you haven’t already, purchase a coffee grinder. These are great not only for grinding your beans but for grinding fresh & dried herbs. The model I have, ($15 at Wal-Mart) has a measuring cup as a lid, multi-grinding speeds for specific types of coffee makers and how many cups you are making. Measure out your beans, (2 Tablespoons of ground coffee for every 6 ounces of filtered water) don’t skimp on coffee, more is better, less is bitter.  Grind your beans at the appropriate setting for your maker & how many cups you are making. 

Now, for the coffee maker itself. Choose a maker that will bring out the best in your coffee. A couple of years ago I switched from a drip-style coffee maker to an electric percolator. What a difference it made! My model is the kind that can be put fully into the water for cleaning if necessary; making it easier to clean and a clean coffee maker is a must when making your best cup of coffee.  Keep your drip-style maker clean by running a solution of water and vinegar through the system every other week or so and wash your carafe daily.

Use a good purified water (tap is fine, but you will get even a better flavor if you can use purified or bottled water). Measure out the appropriate cups in your carafe or percolator.  Put your freshly ground beans in the filter basket and start your brew.  Instead of hanging around to wait on my brew, I get ready for the day and about 10 minutes later the coffee is ready. What I do next is get my favorite cup, add a little sugar and flavored creamer, stir and add my coffee; stirring constantly to ensure that the sugar melts and the creamer is well blended.  I then go outside to the porch and enjoy my brew with a good book or crossword puzzle. Here recently, I’ve gotten to spend time with my husband, making that first cup of coffee even more enjoyable!

Thursday, October 25, 2012

Jack the jack-o-lantern

Getting ready to carve that special pumpkin for this year? We chose "Jack" the skeleton for our special jack o' lantern and I wanted to share a couple of pictures with you. First find the perfect pattern for you, we used :http://family.go.com/printables/article-935130-jack-skellington-pumpkin-carving-template-t/  this link will take you directly to the printable I used below. The directions on the site are very easy and be sure to read over them carefully to be sure you have a successful outcome! In case of an accident with the sculpture, repair with tooth picks. As you can see at the finished results below, it turned out great!!

Sunday, August 12, 2012

Popular Home Remedies for Dandruff


I was recently asked if I knew of any kind of dandruff control home remedies. After a little research with my home remedy books, the following list is what I've found. It is my sincere hope that one if not all of these remedies will help!

1.  To get rid of dandruff, take some strong sage tea and a little soap to wash your head, then rinse very will with a little vinegar in the rinse water.

2.  One teaspoon vinegar in one cup of water is a great final rinse for the hair.  It is a preventive against dandruff or scaling of the scalp.

3.  Put  a few drops of tea tree oil into your shampoo bottles to get rid of dandruff and for a good feeling scalp.

4.  Is your dandruff problem getting you down? Keep it in check by crushing two aspirins to a fine powder and adding it to the normal amount of shampoo you use each time you wash your hair.  Leave the mixture on your hair for 1-2 minutes, then rinse well and wash again with plain shampoo.

5.  Got a bit of a flaky problem? To get dandruff under control, wet your hair and then rub a handful of baking soda vigorously into your scalp.  Rinse thoroughly and dry.  Do this every time you normally wash your hair, but only use baking soda, no shampoo.  Your hair may get dried out at first.  But after a few weeks your scalp will start producing natural oils, leaving your hair softer and free of flakes.

6.  If itch, scaly dandruff has you scratching your head, relief may be no farther away than your refrigerator.  Just massage 2 tablespoons lemon juice into your scalp and rinse with water.  Then stir 1 teaspoon lemon juice into 1 cup water and rinse your hair with it.  Repeat this daily until your dandruff disappears.  No more itchy scalp, and you hair will smell lemon-fresh.

7.  To treat a bad case of dandruff, wash your hair with your regular shampoo, then rinse with alcohol based mouth wash.  You can follow with your regular conditioner.

8.  The abrasiveness of ordinary table salt works great for scrubbing out dandruff before you shampoo.  Grab a saltshaker and shake some salt onto your dry scalp. Then work it through your hair, giving your scalp a massage.  You'll find you've worked out the dry flaky skin and are ready for a shampoo.

9.  To give your dandruff the brush-off, follow up each shampoo with a rinse of 2 cups apple cider vinegar mixed with 2 cups cold water.  You can also fight dandruff by applying 3 tablespoons vinegar onto your hair and massaging into your scalp before you shampoo.  Wait a few minutes, then rinse it out and wash as usual.

Monday, June 4, 2012

Cool Denim Placemat!


Upcycled Denim Placemat
Before you start:
You could absolutely sew the entire project if you wish.  Sewing such heavy fabrics can sometimes pose a problem for home machines and our intent was to offer an easy solution.
If you don't have any little ones, a trip to the local thrift store will provide you with more than you need.
The placemat could be backed with just about any fabric although I prefer one that is a bit sturdy.  I chose some heavy duty twill that I had left over from another project.
I sewed a 'seam' around the pocket with denim top stitch thread around the pocket where I had removed it from the discarded pants to keep with the theme, but you could skip that step if you wish.
The standard size for a placemat is 18"x14".  You could make yours bigger, but I would use that as a minimum.
If looking for adult jeans at the thrift store, try to find the biggest pair you and find.  Take the kid's jeans pocket with you to match the color as closely as possible.
It probably goes without saying, but make sure your denim is washed first.
Placemat2
The materials:
  • Kid's jeans
  • Adult jeans
  • Backing fabric
  • No-sew fabric adhesive tape
  • Iron
  • Scissors or rotary cutter
  • Sewing machine
  • Seam ripper
The steps:
  1. Remove the pocket(s) from the kid's jeans with a seam ripper.  Set aside.
  2. Cut out front and back leg panels from adult jeans.  Make pieces as big as possible excluding the seams.
  3. Cut panels again making them rectangles and removing any excess.
  4. Sew panels together with a 1/2 seam allowance to make one large panel at least 20" wide.  Ours took three panels sewn together.
  5. With the iron, press the seams flat.
  6. Measure and cut the placemat top 2" bigger than the overall desired measurement (in our case, 20"x16").
  7. Press a 1/2" hem on each edge of the denim.  Fold over 1/2" again and press.
  8. Using no-sew tape attach the pocket to the front of the denim in the bottom right hand corner.  The top of the pocket should be approximately 7 inches from the top edge.
  9. Cut your backing fabric to the exact measurement of the overall desired measurement.
  10. Turn the placemat over and insert the backer.  Using the no-sew tape adhere the short sides first.  Be sure to keep the heat on long enough for the pieces to stick firmly together.
  11. Cut away some of the fabric from the corners of the denim to remove some of the bulk.  Fold the fabric on each end of the long side to create a diagonal line when folded over.  This will create a nice mitered corner.
  12. Fold over long edges and adhere with no-sew tape. 

Sunday, June 3, 2012

Learn How to make great carboard fun for you and the kids!


How To Work With Cardboard

I am very pleased today to bring you a tutorial on how to work with my favorite-est crafting material of all: 


C.A.R.D.B.O.A.R.D !!!!


I've been working with cardboard even longer than I've been sewing and working with fabric. One of my most-used toys as a kid was a roll of scotch tape, with which I assembled all kinds of structures with found objects around the house. Whenever we had access to cardboard, which wasn't as often as I wished, and certainly nowhere as often as I have now, I was practically in heaven. Because I never had formal cardboard-builing lessons or read any books on how to work with cardboard, I imagined that everyone else also just winged it with cardboard. The fun has always been in the designing, experimenting and making. But based on the many requests I've received from readers, I'm thinking maybe I assumed wrong.

So today I am happy to share with you as much as I know about cardboard.

First, though - lest you think I'm any good at it - let me show you some realcardboard art - herehere, and here.  When I look at work like that, I think fabric issoooooooooo last season.

Righto - now that we're all properly demoralized inspired, let's begin!


Why Work With Cardboard?
Duh. It is SUPREME.
Just in case that doesn't convince you, let's list other lesser reasons:
  1. It is (in most cases) free.
  2. It appeals to the environmentally-conscious, pro-recycling parts of our human nature.
  3. It is disposable - toss it back into the recycling bin when you're done playing.


Where Can I Get It?
Anywhere. And everywhere.
  • It sneaks into your home each time you bring groceries and sundries in from the store. Look for it housing cereal and diapers, on the backs of writing tablets, in between folded bedlinen.
  • If you know of people who've recently moved into your neighborhood, bring them a casserole and then beg them for their moving boxes - these are often made of exceptionally sturdy cardboard.
  • Bring your kids to supermarkets and members' clubs like Sam's Club and Costco, and ask the staff for cardboard boxes and the giant sheets that line their pallets. They are usually only too happy to oblige, especially when you say it's for a children's craft project.
  • Conduct surveillance on your husband's (I'm stereotyping here) home improvement adventures and ferret away all the packing boxes from lawn edging, shower doors, etc.
  • Wait for your freezer/TV/computer to die and then order replacements based on which ones come in the best cardboard boxes.
  • Save all the shipping boxes that come in the post.
  • Buy them  - but only as the last resort, after scavenging all other free sources - from office supply stores.


How Do I Build A Cardboard Stash?


Case 1: If you are lucky enough to live in a huge house:
  • Find a secret room.
  • Throw every cardboard box you find into it.


Case 2: If you are unlucky and have to think about space:
  • Cut open and flatten every cardboard box you find.
  • Slide them under beds. Or between the mattress and box spring. Or behind the headboard.


Save silly little things like the inner tubes of toilet paper, paper towels and wrapping paper.


and the occasional fancy paperboard (compressed layers of paper) gem that comes along:


Somewhere along the way, you might need to decide if you're more of a cardboard box refashionist or a bona fide cardboard freak. Here's what I mean:

The Cardboard Box Refashionist:
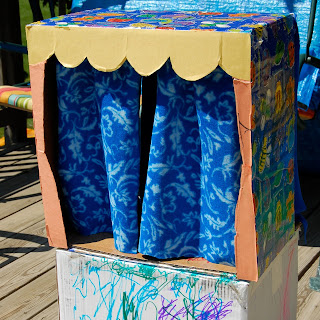
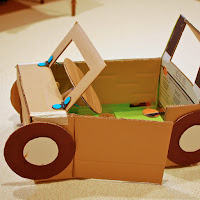
You work primarily with cardboard boxes to turn them into things that retain the structure of the box. So stuff like cars, puppet stages, ovens, personal rocketships, that sort of thing. When you see a cardboard box, your first thought is what you could make out of it that has those dimensions. You love that the box already has corners and a flap and sides to work around. You're probably blind to regular sheets of cardboard lying around, or you think, "Hm, I wonder if I could use that as a cutting mat. Or maybe my kids might like to color on it." 
If you were working with fabric, you'd be the one cutting up men's shirts and turning them into girl's frocks while retaining the button plackets, bottom hems and collars. 

The Bona Fide Cardboard Freak:
You will use any cardboard to make anything. When you see a cardboard box, your first thought is to check the flute size and then cut it up into flat shapes and make something. You hate, absolutely hate how the pre-existing fold lines of the flaps limit you to cutting out pieces of certain sizes. Whenever you see large pieces of cardboard, you froth at the mouth and begin to have visions of furniture and entire houses for victims of national disasters.

If you were working with fabric, you'd be the one buying fabric in ridiculously large yardage, with plans to sew every single garment in the most recent issue of Burdastyle.

Most of us vascillate between both roles, depending on what we can get our hands on.

What Kinds of Cardboard Can I Use?
Any kind, silly! They are all supreme. But some are more supreme than others.


Here are some common types:


Thin, cereal-box type- 
this is good for projects that require a lot of folding and rolling. Pick this for making cones, tubes and tiny boxes.


Thicker, back-of-writing-tablet type - 
doesn't roll well, but folds nicely when scored (will discuss this later). Structures made from this keep their shape better than those made from the cereal-box variety.


Single Wall Corrugated Cardboard - 
single layer of flutes (those wavy things) between two layers (called liners) of cardboard.


which comes in different thicknesses. Check out the size of the flutes - the smallest flute (somewhere in the middle of the stack) is in a USPS priority mail box.


Double Wall Corrugated Cardboard- double layer of flutes:


See - compared to the single wall cardboard below it.


There does exist Triple Wall Corrugated Cardboard, but I haven't seen it yet (drats). Updated in Oct 2011: Yes, I have! Hurrah! Here it is:


Now this is one of my particularly precious stash treasures: it is extra thick, extra strong, surprisingly light

and has the prettiest pattern of corrugation. Quite different from the regular corrugated cardboard. Almost honey-comb like. I wish I knew what it was called. We found two of these strips in a box containing some household appliance, and used the first one for a ramp for matchbox cars. It lasted years.

Slightly less rare, but equally valued is White Cardboard. It's like the cashmere of cardboard. White on one side means the kids can have a field day coloring it in really bright colors. Whenever I find white cardboard, I save it for special occasions.


Then there are the other kinds of 'cardboard' like paper board, cardstock, poster board but you know those already. 


What Tools Do I Need?
To each his/her own. I'll share what I use:


For cutting: kitchen shears and a craft knife/NT cutter/X-acto knife/box-cutter.


For gluing: hot glue gun, UHU craft glue, masking tape and packing tape. I've seen UHU glue sold in Michaels. 


What Makes Corrugated Cardboard So Strong?
Corrugated cardboard gets its strength from the flutes between its liners. They dictate how you can manipulate the cardboard itself, but when used correctly, can add a lot of strength to a structure.


First, and most obviously, avoid including pre-existent creases, unless you want them for a particular reason. These are weakened areas in the cardboard.


Second, make fold, bend and roll lines parallel to the flutes.

Let's come back to that in a minute. First, let's work with regular cereal-box cardboard:

Suppose you want to join two little pieces at an angle, like the walls of a tiny box. First, you'd need to make a little overlapping tab for applying some adhesive. Sorta like a seam allowance.

For it to bend, you'd need to score a fold line. This just means you scratch a line with something thin that will weaken the surface but not cut through it. Like the back of a knife blade. 


Then you can make a neat fold.

You'd put some glue on the underside of the folded tab

and attach it to another piece.

You could score and fold in any orientation because cereal box cardboard has no corrugation.
With corrugated cardboard, you'd have to pay attention to how the flutes are lined up. 


Folding/Bending:
You'd want your fold line to be parallel to the flutes- this way you only distort one or two flutes in the fold and the rest of the piece remains strong. If the cardboard is especially thick, you might need to score the fold line first.


Suppose you needed to fold in the perpendicular direction. With very thick corrugated cardboard, you might not even be able to bend it in this orientation. So you'd score


before folding. Notice the upper liner and the flutes have had to split in order for the fold to happen. This means the fold is only as strong as that bottom liner layer i.e. much weaker than if you'd folded it parallel to the flutes, as we did earlier.


Rolling
is like making a series of gentle bends to attain a curve. Again this is done with the bends parallel to the flutes.


This is a thin piece of corrugated cardboard rolled in the wrong direction (perpendicular to the flutes) - there is a horrible, uneven mess of creases in the middle.


Cutting
One of the questions I've most often been asked is how I cut cardboard. 
If the cardboard is thin and small, I use scissors:


If the cardboard is thin but large and hard to manouevre with scissors, I use my craft knife on a cutting mat (yes, the same one I use for fabric). I draw the knife along a ruler edge for straight cuts, or free-hand around curves. This is especially helpful in cutting out holes and windows.


If the cardboard is thick, I use the same knife as a saw. I hold the cardboard away from the cutting board and use an up-down sawing motion all around the outline.


Assembling Without Glue:
If you are working with a cardboard box, you can assemble the usual box-way, for instance, tucking in the flaps:


or taping them down.


You could also make simple slot joints:


Then there are commercial connectors you can buy, like Makedo and Mr McGroovy's:


Assembling With Glue:
When making flat structures (like cardboard cookies and that fraction puzzle), Elmer's White Glue works OK. It's especially safe for children. When making 3D structures however, I don't use Elmer's White Glue. It's strong enough for wood, yes, but it dries slowly and requires either a clamp or someone to actually hold the pieces together in place overnight. If I am joining two pieces that don't require special, fiddly positioning, I use a hot glue gun. It's fast and strong. Otherwise, I use my UHU craft glue - it's fast, but not instant like hot glue. I can slide things around to position them for a few seconds before it dries.

If you remember, attaching thin cardboard together at their edges requires an overlap tab. Thick corrugated cardboard, having an actual edge of its own, doesn't require a tab. Glue can be applied directly to the edge to adhere it to a surface. Here is a series of pictures to show you how a curved surface was glued to a flat circular base - this was Rapunzel's Tower from here:


How Do I Design Cardboard Structures? 
Ah, the million-dollar question.
I don't know. You'd have to look around you and get inspired, I guess. Look at architecture. Look at toys. Let the ideas percolate for a few months. Then sketch them out. Anything made of cardboard can be translated into wood for a sturdier and more permanent product. The converse is true - anything made of wood/plastic can be replicated in cardboard. Even furniture! 

If you're new to cardboard, start with the cereal box kind of projects - cut out masks, make little teepees, retractable telescopes, indoor boomerangs, little cars for Playmobil. 

If you're ready for something 3D, grab a box and cut holes in it. Turn it into a fishtank, a cage, a puppet stage, a washing machine, a castle. 

Ask your children what they think the box should become. I guarantee you they will have very strong opinions. It doesn't matter if everybody starts out making a featureless tunnel out of boxes and calling it a space shuttle. Over time, you will find the motivation to add things to it - a round window, wings, a flip-up door, maybe even wiggly little control knobs. Sometimes make toys for your kids, but also make toys with your kids, so they get to see you think, plan, build and develop an idea. Fun has so many levels!  

Here is a roundup of some old cardboard projects - child's play (literally!) compared to those real works of art I linked to earlier. I don't usually include templates or patterns because the size of the product depends entirely on the size of the cardboard sheet/box I have to work with. And much as I'd like to build giant cardboard structures, I've been banned by the husband due to space constraints. Click on each of the pictures to take you back to (where available) the original posts.